
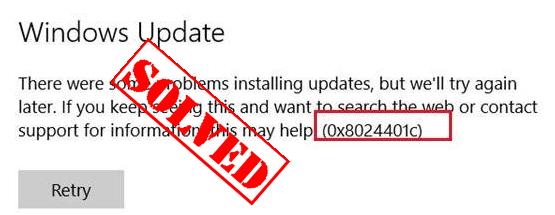
If you see the Windows Update error 0x8024401c in your computer when running the Windows Update, you run into a problem installing the updates and have no idea what to do. No worries! There are fixes to the issue.
How do I fix 0x8024401c in Windows? Try these fixes:
- Check the network settings
- Update drivers
- Modify the setting in Registry Editor
- Repair system files
- Perform a clean boot
Why does 0x8024401c happen on my computer?
Why does the error occur? the error 0x8024401c usually occurs when you have problems installing or downloading the Windows updates on your computer.
The causes generally are the improper Internet connection, or the server timed out waiting for the request. Another reason is likely because of the inappropriate device drivers in your computer.
You can try the methods below to fix 0x8024401c on your computer.
Method 1: Check the network settings to fix 0x8024401c
As mentioned above, the network issue can cause the 0x8024401c error, so you can check the following two settings of the network to fix the error.
1. Switch the network connection in your computer
As many people know, switching the network connection fixes the issue.
Thus, if you are connecting to WiFi in your computer, you can try switching the WiFi connection to a wired connection or Ethernet connection and try the Windows Update to see if it works. If you are using the wired connection, you can change to a WiFi connection, then try the Windows Update again to see if it works.
2. Uncheck IPv6 network
If switching your network doesn’t work, you can try to uncheck the IPv6 network and make your computer go with the IPv4 network. Follow the instructions to do that:
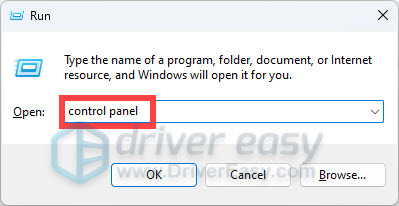
1) On your keyboard, press the Windows logo + R keys simultaneously to open the Run box. Type control panel and hit Enter.
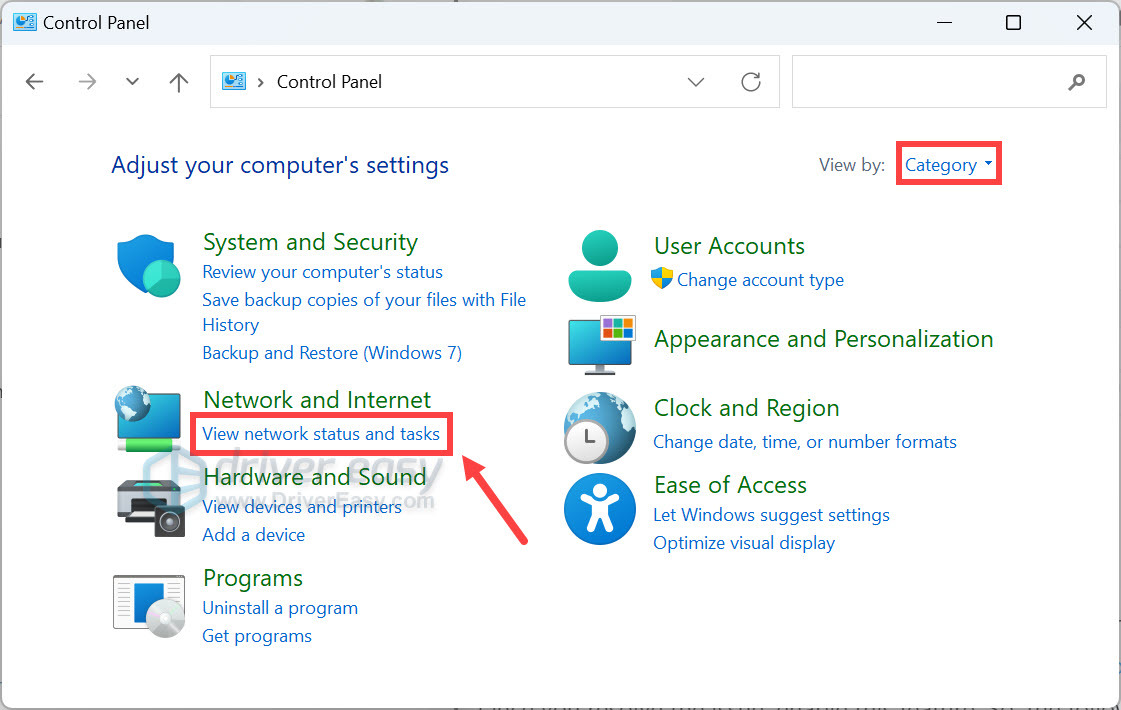
2) Click View network status and tasks. If you can’t find it, make sure you’ve set Category as your “View by” from the top-right corner of the window.
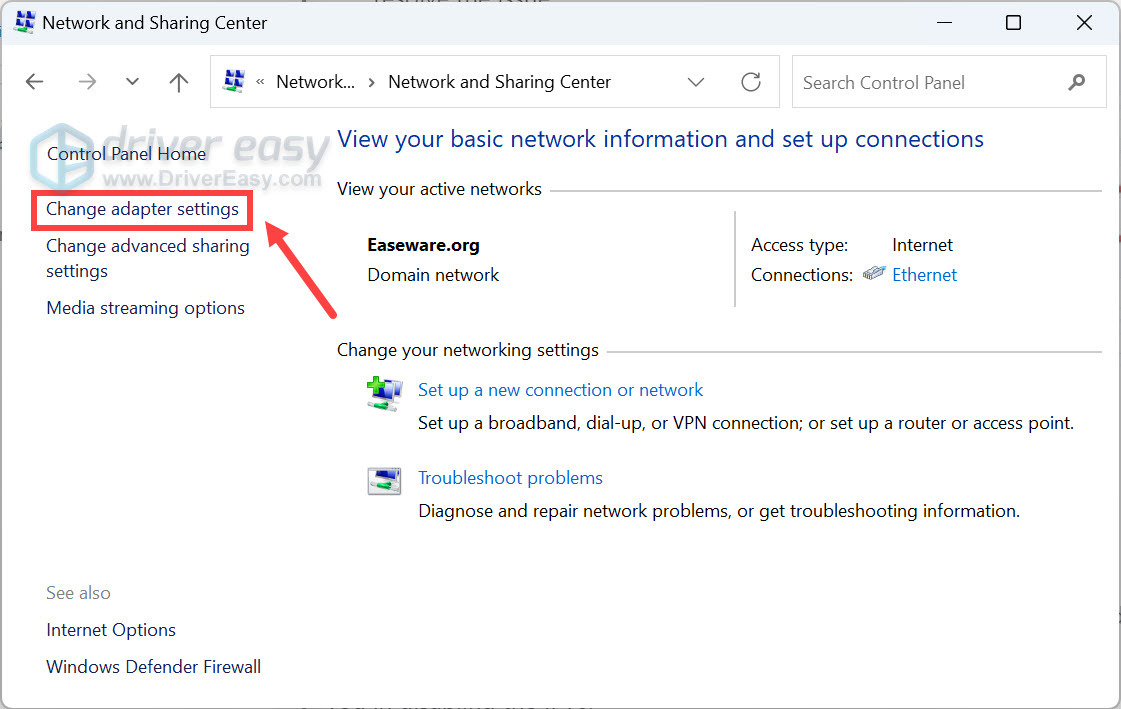
3) Click Change adapter settings.
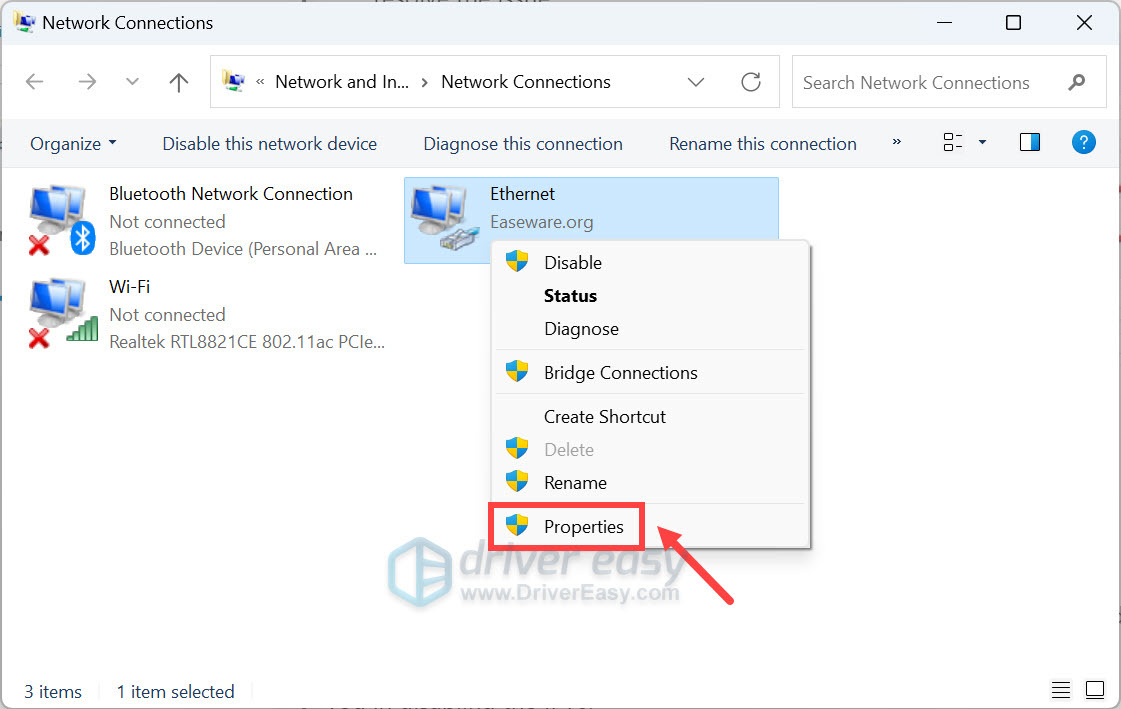
4) Right-click the network connection (LAN, Ethernet, or WiFi) that you are currently connecting, then click Properties.
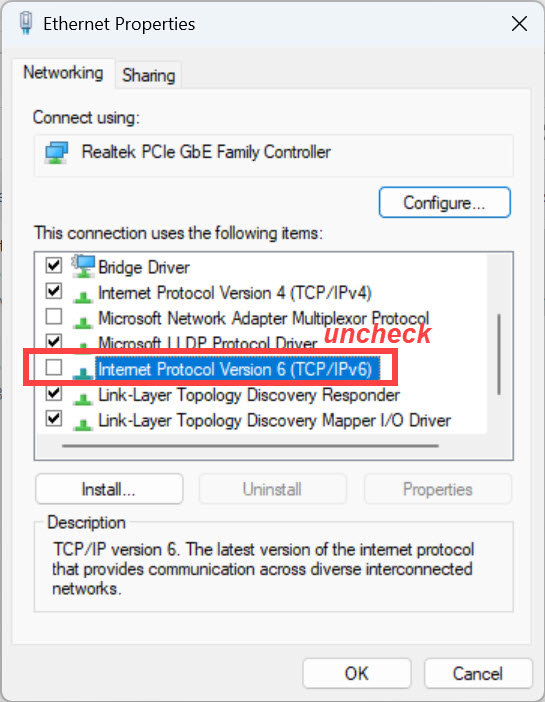
5) In the popup pane, uncheck Internet Protocol Version 6 (TCP/IPv6). Then OK to save the setting.
6) Restart your computer and try to update your Windows again.
Method 2: Update drivers to fix 0x8024401c
The missing or outdated drivers in your computer can also stop the Windows Update from working, so you can update the drivers in your computer to fix it.
There are two ways you can update the drivers: manually or automatically.
Manual driver update – You can update your drivers manually by going to the manufacturer’s website and searching for the most recent correct driver.
Automatic driver update – If you don’t have the time, patience, or computer skills to update your network card driver manually, you can, instead, do it automatically with Driver Easy. Driver Easy will automatically recognize your system and find the correct drivers for it:
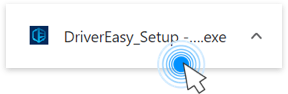
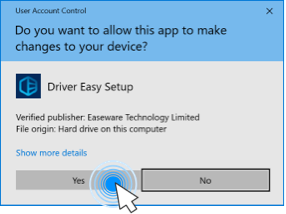
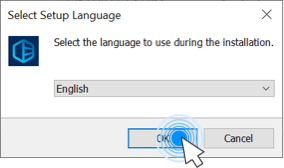
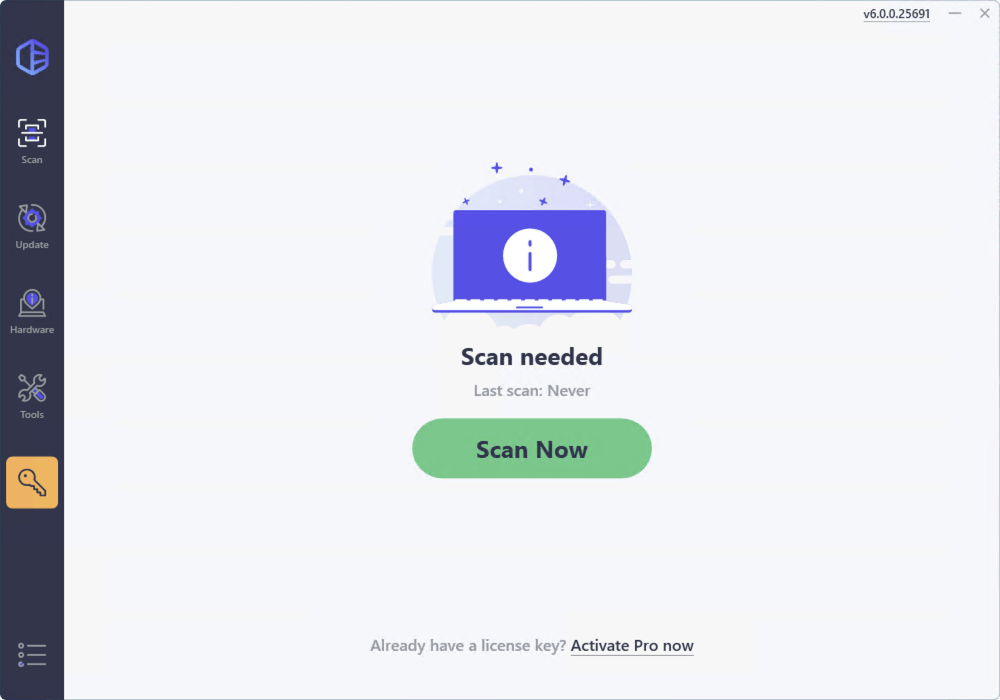
1) Download and install Driver Easy.
2) Run Driver Easy on your computer, and click Scan Now. Driver Easy will then scan your computer and detect any problem drivers.
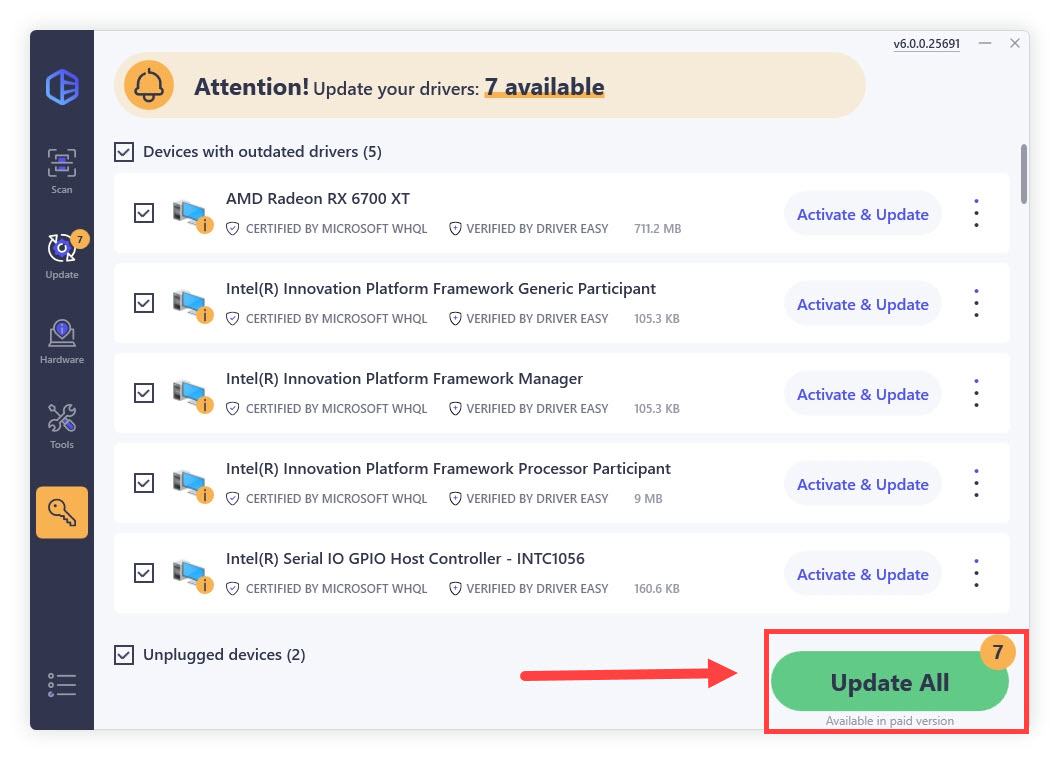
3) Click Update All to automatically download and install the correct version of all the drivers that are missing or out of date on your system. (Note: Upon selecting the ‘Update All’ option, you will be asked to upgrade to the Pro version. A 7-day free trial, including all Pro features like high-speed download and one-click install, is available if you’re not ready for the Pro version yet. Rest assured, you won’t incur any charges until after the 7-day trial.)
4) After updating all the drivers, restart your PC and try Windows Update again.
Method 3: Modify the setting in Registry Editor to fix 0x8024401c
You can try to modify the settings in Registry Editor to fix Modify the setting in Registry Editor to fix 0x8024401c in your computer. Follow these steps:
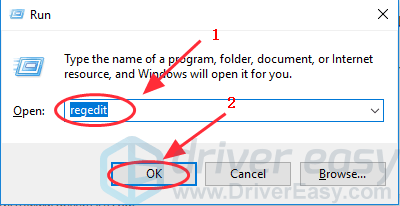
1) Press the Windows logo key  + R at the same time on your keyboard.
2) Type regedit in the Run box, and click OK.
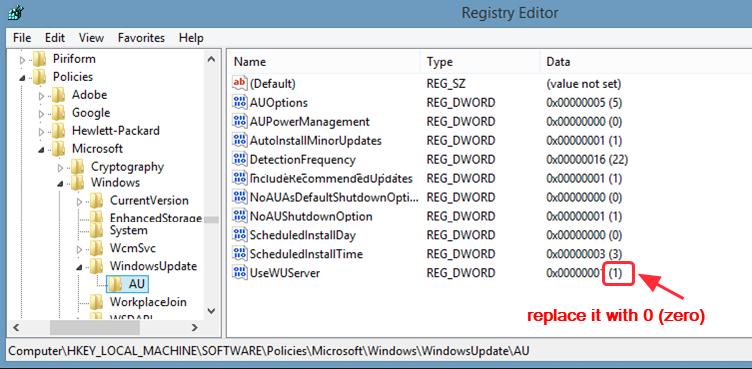
3) Go to HKEY_LOCAL_MACHINE > Software > Policies > Microsoft > Windows > WindowsUpdate.
4) Click AU in WindowsUdpate, and find UseWUServer.
5) Replace whatever is in the registry value data on the right pane with 0 (zero).
6) Click OK to save.
7) Restart the computer and try to install the update again.
Method 4: Repair system files
The 0x8024401c error may be related to system files. When the system files are broken or corrupted, it may cause a Blue screen issue. To fix that, you can utilize System File Checker (SFC). It’s a Windows utility that helps automatically check and repair the corrupted or incomplete system files, so you can run an SFC scan in your system and let it be automatically repaired if there are any issues.
1) Type cmd in the search box.
2) Right-click Command Prompt, and select Run as administrator.
3) Type sfc /scannow in the window, and press Enter.
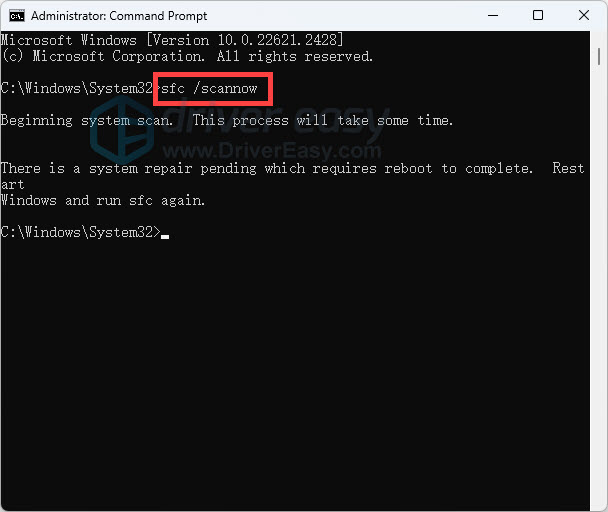
4) This process can take some time, and it will try to automatically fix the issues after scanning. So don’t close the window until verification 100% complete. After it’s completed, restart your PC and try updating Windows again.
Method 5: Perform a clean boot
You can perform a clean boot in your system. Try the steps:
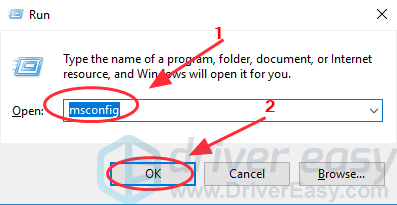
1) Press the Windows logo key + R at the same time on your keyboard.
2) Type msconfig in the Run box and click OK.
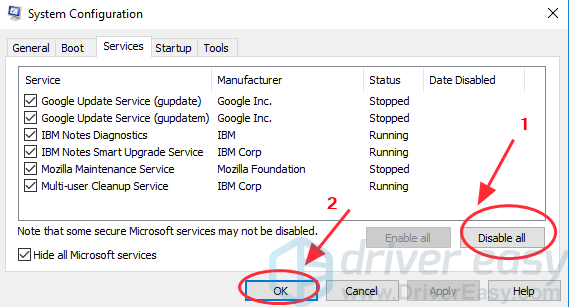
3) Click the Services tab, and check the box next to Hide all Microsoft services.
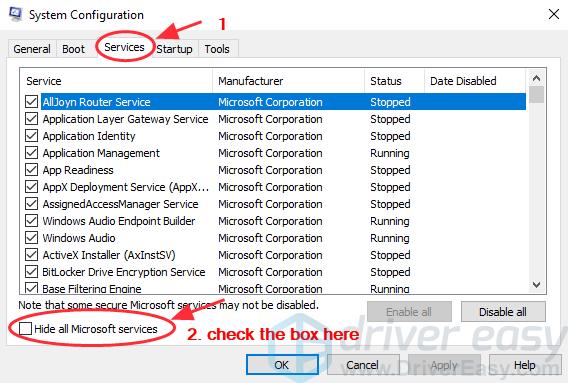
4) Click Disable all, then click OK.
5) Restart your system and check for the updates.
These are the useful methods to fix Windows Update error 0x8024401c. If you have any further questions, feel free to comment below and we’ll see what more we can do to help.
